

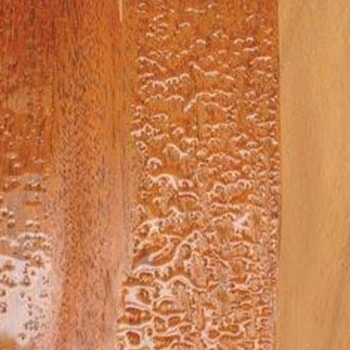
Settling / Precipitation
When components settle down and harden, the defect is termed as Settling or Precipitation.
| Possible Causes | Solutions |
|---|---|
| Using Wrong Thinners | 1. If the settling seems moderate, add proper solvent and agitate continuously, till resolution. 2. If need be, use stronger solvents. |
| Paint too Cold | Warm the paint till its temperature reaches 20-30℃. |
| Over- Reduction | Add more fresh paint to get the right consistency. |
| Quick Addition of Reducer or Catalyst without sufficient Stirring | Add the Reducer or Catalyst slowly and stir constantly. |
| Settling of Pigment or Flattening Agent at the bottom | 1. Check the bottom of the paint container with a spatula. 2. Stir paint thoroughly before use. |
Viscosity / Heavy-bodied
When the paint’s consistency becomes thicker, it’s termed Viscosity and since it is heavier, it’s also called Heavy-bodied.
| Possible Causes | Solutions |
|---|---|
| Evaporation of Solvent in the paint, at normal temperature that causes it to become heavy-bodied. | 1. Use the same solvent, used by the manufacturer to make the paint. 2. Check the viscosity manually, using a cup. |
| Using Improper Solvents for Thinning | Use recommended solvents for thinning purposes. |
| Using Catalyzed materials beyond the pot life of the paint | Look for directions and see, if it’s mentioned whether the paint can be recovered by adding additional paint and catalyst. |
Skinning / Gelling in container
The paint develops a thin coat on the top or gels inside the container and this defect is called Skinning or Gelling.
| Possible Causes | Solutions |
|---|---|
| Air-Drying Material is Exposed to air because it is partially full | 1. Float the thinner on the surface of the paint and seal it tight. 2. Also you can put the content in a new can and seal it tight. |
| Material has Gelled beyond a certain point | Discard the paint as it cannot be recovered. |
| Storing the product at High Temperature outside or beyond the Shelf-life | 1. Store the product inside, at room temperature. 2. If the product is polyester, Polyurethane or Pre-catalyzed Lacquer, use it before six months. |
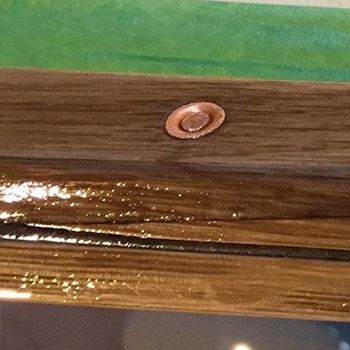
Foaming
When foam is formed, and it bubbles inside the container, it is referred to as Foaming.
| Possible Causes | Solutions |
|---|---|
| Mixing Rapidly | 1. Mix slowly. 2. Ensure not to shake using mechanical shaker. |
| Trapping of foam in the Container | Use the recommended De-Foamer. |
Foaming
When foam is formed, and it bubbles inside the container, it is referred to as Foaming.
| Possible Causes | Solutions |
|---|---|
| Mixing Rapidly | 1. Mix slowly. 2. Ensure not to shake using mechanical shaker. |
| Trapping of foam in the Container | Use the recommended De-Foamer. |
Discoloration / Floating particles
When the paint comes in contact with floating particles in the painting area, discoloration is a possibility. Discoloration can be caused by other factors/reasons too.
| Possible Causes | Solutions |
|---|---|
| Vapours or Fumes are present in Painting Area | Check for the presence of ammonia or amine fumes from adhesives or any other sources. |
| Reaction of Aluminium and Steel parts in the spray equipment with Water Borne or Acid Cure | Use stainless steel or solvent resistant plastic parts and liners in spray equipments. |
| Paint Lining comes off or the Drum is improper | 1. Strain the paint through a cheese cloth or a fine filter. 2. Ensure no contaminants are present in the filter. |
| Presence of Old Nitrocellulose Products | Discard and use fresh material only. Since, it can become amber on aging in the can and react with steel. |
| Chemical Reaction to Surface Treatments | 1. Check the pH of the surface. 2. If it is in the acidic range, it can react with the alkaline materials. |
Dirt / Seediness
Dirt / Seediness
Dust and dirt particles settle on the surface, during the application of the paint, the condition is called Dirt or Seediness.
| Possible Causes | Solutions |
|---|---|
| Unclean Conditions in the Surrounding Area | Ensure that the painting area is clean. |
| Dust in the Spray Room or Drying Area. | Rearrange equipment so that any spray dust from the booths or other workshop areas does not reach the finishing room. |
| 1. Dirt in Air or Paint line of spray apparatus. 2. Sanding near the Paint area can blow fine dust particles in the air. | 1. Check for the Presence of dirt and oil in the paint area by spraying air from the spray gun, on a white clean cloth. 2. After spraying look for any dirt or oil marks on the cloth. |
| Improper Thinning results in Resin Kick-Out, rendering the resin incompatible. | Thin the paint perfectly with the recommended right thinner. |
| Paint subjected to extreme Cold results in Reduced System Compatibility or Solubility that causes seediness. | 1. Warm the paint to reach room temperature or 25℃, prior to application. 2. If the paint is still seedy, consult your coatings supplier. |
| Dirt in Paint | Strain paint before painting. |
| Appearance of particles after spraying is done and not while spraying the wet film. | 1. Use a magnifier to rule out the possibility of air bubbles. 2. Pour some paint on a glass surface and let it dry in dust-free area. 3. After drying, examine the glass by holding it near a light source and look for the presence of any dirt or dust particles. |
Dirt / Seediness
Dirt / Seediness
Dust and dirt particles settle on the surface, during the application of the paint, the condition is called Dirt or Seediness.
| Possible Causes | Solutions |
|---|---|
| Unclean Conditions in the Surrounding Area | Ensure that the painting area is clean. |
| Dust in the Spray Room or Drying Area. | Rearrange equipment so that any spray dust from the booths or other workshop areas does not reach the finishing room. |
| 1. Dirt in Air or Paint line of spray apparatus. 2. Sanding near the Paint area can blow fine dust particles in the air. | 1. Check for the Presence of dirt and oil in the paint area by spraying air from the spray gun, on a white clean cloth. 2. After spraying look for any dirt or oil marks on the cloth. |
| Improper Thinning results in Resin Kick-Out, rendering the resin incompatible. | Thin the paint perfectly with the recommended right thinner. |
| Paint subjected to extreme Cold results in Reduced System Compatibility or Solubility that causes seediness. | 1. Warm the paint to reach room temperature or 25℃, prior to application. 2. If the paint is still seedy, consult your coatings supplier. |
| Dirt in Paint | Strain paint before painting. |
| Appearance of particles after spraying is done and not while spraying the wet film. | 1. Use a magnifier to rule out the possibility of air bubbles. 2. Pour some paint on a glass surface and let it dry in dust-free area. 3. After drying, examine the glass by holding it near a light source and look for the presence of any dirt or dust particles. |
Excessive material usage
When the spray gun is not held as per the recommended guidelines, defects begin to appear. These defects are a direct result of Excessive Material Usage.
| Possible Causes | Solutions |
|---|---|
| Failing to Trigger the gun at each stroke | 1. Release the trigger after every stroke. 2. Make it a habit. |
| Holding the Gun too Far from the surface | 1. Hold the spray gun at a distance of 6-10 inches at right angle to the surface that needs to be painted. 2. Work the gun always at right angle to the surface. |
| Fluid Pressure in the spray gun is too Low | 1. Increase the fluid pressure. 2. Check by cutting off air to spray gun. 3. Hold the spray gun at shoulder height and now adjust the stream of paint to fall approximately 3 feet from the gun. |
| Air Pressure is too High in the spray gun | Set low Air- Pressure. |
| Wrong Air Cap or Fluid Tip | Use proper combination as recommended by the manufacturer’s guide. |
| Depositing Material Film or Irregular Thickness | 1. Calculate the depth of the wet finish film accurately. 2. Learn out of experience. |
Excessive Spray - Fog / Dry
When the spray gun ejects excessive paint not as per recommended guidelines, defects appear. They are a direct consequence of Excessive Spray.
| Possible Causes | Solutions |
|---|---|
| Using Wrong Solvent blend | Choose a slow evaporating thinner. |
| Atomizing Air Pressure too High | Use necessary amount of compressed air only. |
| Over Reduction of Material | 1. Use less reduction. 2. Add fresh material to over reduced material. |
| Holding the Gun too Far from the surface. | Hold the spray gun at a distance of 6-10 inches as recommended. |
| Spraying Past the Surface of the product | Release trigger as the gun passes the target. |
| Wrong Air Cap or Fluid Tip | Use proper combination as recommended by the manufacturer’s guide. |
Orange Peel
When the coated surface develops a kind of finish that resembles an orange peel, the defect is termed Orange Peel. The coating is not smooth but exhibits the texture of an orange.
| Possible Causes | Solutions |
|---|---|
| Improper Thinning of paint | 1. Choose solvents that evaporate slowly. 2. Use recommended amount of thinner. |
| Using Poor Grade Thinner | Use better grade thinner for material. |
| Failure to Deposit a Wet coat | 1. Check solvent. 2. Use correct spread and overlapping of stroke. |
| Material Not Dissolved thoroughly | Mix material thoroughly. |
| Presence of Drafts (Synthetics & Lacquers) | Eliminate excessive drafts. |
| Presence of Low humidity, causing rapid dry conditions | Raise humidity of room. |
Defects due to problem in Spray Gun
Defects due to problem in Spray Gun.
| Possible Causes | Solutions |
|---|---|
| Stroking is too Rapid | Stroke slowly and make deliberate slow spray passes. |
| Air Pressure is too Low in the Spray Gun | Increase atomizing pressure or reduce fluid pressure. |
| Using Wrong Air cap | Select correct air cap for the material and the feed. |
| Fluid Pressure in the Spray Gun is High | Decrease the fluid pressure. |
| Holding the gun too Far from the Surface or too Near | Hold the spray gun at a distance of 6-10 inches from the surface. |
| Spraying is Striking a Wet and Sprayed surface | 1. Do not over spray. 2. Ensure not to spray on a surface that has been sprayed already. 3. Spray detail parts first and end with wet coat. |
| Air Temperature is too High and Hot | Use retarder solvent to lower the temperature. |
Sagging
When the paint gives a downward drooping appearance, the condition is referred to as Sagging. This results when a heavier coat of paint is sprayed on a vertical, or near-vertical surface than the viscosity of the finish.
| Possible Causes | Solutions |
|---|---|
| Slow Over- Reduction of Solvent or by solvent that evaporates too quickly | Use solvents that are consistent with the general nature and temperature of the surface to be coated. |
| Application of coat is too Heavy | 1. Control the coating applied to surface. 2. Apply thinner recommended coats and get a firm paint build. |
| Presence of Draft | Eliminate Draft |
| Presence of Strong Sunlight that causes top drying and consequently, late slipping of film on vertical surfaces | Avoid application in strong sunlight. |
| Weather is cold and there is no circulation of air | Use faster evaporating, reducing thinner or bring room temperature upto 25℃. |
| Dirty Air cap and Fluid tip | Remove cap and fluid tip and clean them thoroughly, before use. |
| Spray Gun held Closer to the Surface | Hold the spray gun at a distance of 6-10 inches to the surface. |
| Spray Gun Manipulated at Wrong Angle to the surface | Work spray gun at right angles to surface. |
| Fluid Pressure too High | Reduce fluid pressure. |
| Failure to release trigger at end of stroke. Thus, stroke does not go beyond the object. | Release trigger after every stroke. |
| Slow Spray Application | Speed up the movement of the spray gun across surface. |
| A Fatty Edge | First, spray the edges with a thin coat. Then, spray the rest of the surface. |
| Improper Atomization | 1. Use larger air cap (Internal Mix). 2. Increase volume of air through horns (External Mix). |
Spray pattern split
When the spray pattern is not proper, it may affect the performance of the spray gun, during the application, resulting in Spray Pattern Split.
| Possible Causes | Solutions |
|---|---|
| Imbalance in air and Fluid | Reduce width of spray pattern. |
| Dirty Air cap or Fluid tip | Remove and clean the tip thoroughly. |
Flow / Levelling
When the paint does not dry to a smooth film after application, it results in brush and roller marks on the surface. This condition is Flow or Levelling and this defect is often unpleasant.
| Possible Causes | Solutions |
|---|---|
| Paint is too Heavy | 1. Reduce the viscosity of the paint and get the correct consistency. 2. Check for correct viscosity using Zahn #2 viscosity cup. |
| Faster Evaporation of the Solvent | Use solvents that evaporate slower, if the air temperature is higher. |
| Improper Air Atomization | Adjust the Spray Gun. |
| Application of paint on Thin Surfaces | Apply paint on surfaces with more passes. Let the application be wet immediately. |
| Increase in Air Movement | Reduce the draft. |
Poor adhesion to Substrate
The paint film does not adhere to the substrate properly; it peels off here and there. This is due to Poor Adhesion to the Surface.
| Possible Causes | Solutions |
|---|---|
| Unclean Surface | Clean the surface with volatile solvent. |
| 1. Lifting of Primer of Sealer from the Surface – An Incompatible Finish. 2. The Solvent in the Finish coat lifts the primer from the surface. 3. Though the film will dry and appear good, primary adhesion will be ruined | Use recommended primer and finish coat together. |
| Sanding the wood to a Smoother consistency. The problem is rampant in hardwoods that have closer grains. | 1. Use 120 grit sand paper. for wood that have closer grains. 2. Use 120-180 Emery paper for softwoods and wood with open grains. |
| Stain Comes off along with the sealer | Stain Comes off along with the sealer Apply a thin coat and then, wipe the stains off. |
| Applying Stains that are too Heavy. Either they are not wiped off or they did not dry, after application. | Ensure that the stain is dry, prior to applying the sealer. |
Poor adhesion between coats
If the paint film does not adhere to the inter-coat properly, it peels off here and there. This is due to Poor Adhesion between coats.
| Possible Causes | Solutions |
|---|---|
| Sealer and Top coat may not be recommended to be used together. | Use the recommended system. |
| Contaminated Primer Surface | 1. Firstly, clean the surface. |
| Excessive Build-up of Stain or Stain not Dry | Dry thoroughly and wipe excess stain. |
| Sanding of the Sealer or Primer too Smooth | Sand with 220-280 sand paper only |
| Drying of Catalyzed Finish for Longer duration between sanding and recoating | Check recoat instructions carefully. |
Skinning / Gelling in container
The paint film does not dry thoroughly due to certain conditions and this results in Poor Drying or Non-Drying.
| Possible Causes | Solutions |
|---|---|
| Humid Weather | If possible, place the wood to be painted in a heated drying room. |
| Cold Weather | 1. Maintain a temperature of at least 25-35 ℃. 2. This temperature is ideal for normal drying. |
| Greasy, Waxy or Unclean Surface | 1. Clean the surface thoroughly with volatile solvents. 2. Let it dry completely before finishing. |
| Before Application, Improper stirring of pigmented finishes into Proper Suspension. | Stir the material thoroughly so that liquids and pigments are evenly dispersed. |
| Incompatibility of Stains with Clear coats, if the application is over a stained surface | Use Proper Stain |
| Improper Ventilation | Ensure good ventilation. |
| Applying Heavy coat to fill rough wood may Retard thorough drying | 1. Do not attempt to use finish coat as a surfacer. 2. Apply only as a normal wet coat. 3. Ensure not to exceed 4-5 wet mils of total film thickness. |
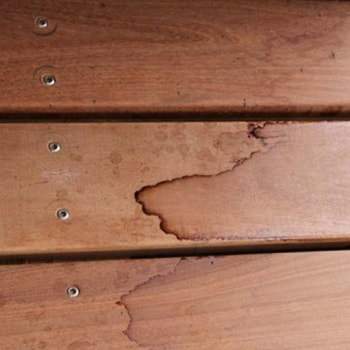
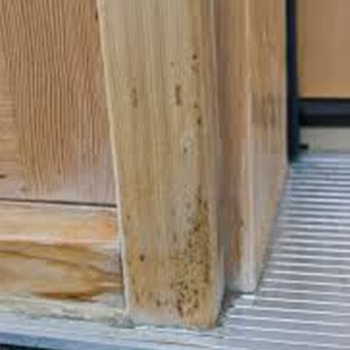
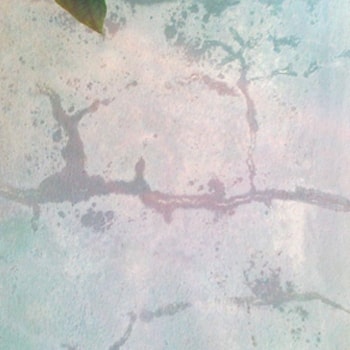
Bleeding / Leaching
When soluble dye from the substrate seeps through the topcoat, the resultant defect is called Bleeding or Leaching. The defect is also termed Tannin, a kind of brown dye that bleeds from the timber when it is wet. Many hardwood timbers are affected by Tannin Leaching.
| Possible Causes | Solutions |
|---|---|
| Improper Sealing of the Organic Red, Yellow and Orange coloured Stains | 1. Avoid Red, Yellow and Orange colours since, they generally bleed. 2. Use Vinyl Sealer to seal the lacquer topcoat. This prevents bleeding. 3. Also, check to see if the Japan colours (Colours that are sacred in East Asia) do not contain any bleeding dyes/pigments. |
| Certain wood with Natural Resin inside called Tannin bleed. Kwila (Merbau), Spotted Gum, Blackbutt, Balau and Tallowood are some woods that bleed when exposed to rain without a coating or sealant. | 1. Wash the timber with deck washes and timber cleaners. 2. In most of the cases, this process reduces Tannin bleed. |
| Tannin Leaching continues for months in timbers Kwila and Merbau owing to their high Tannin content | Seal with a barrier coat. |
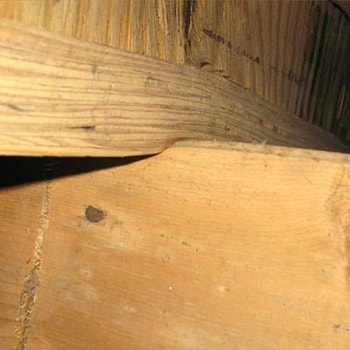
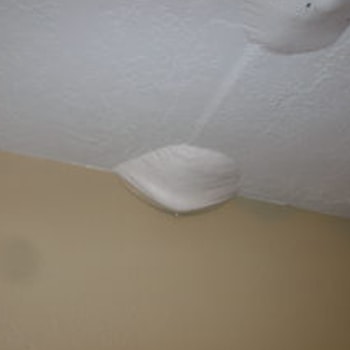
Wood Blistering
The defect caused when bubbles are formed on the surface of a coating, by trapping air or vapours beneath the surface is referred to as Blistering. It mostly occurs in areas where veneer does not adhere properly. Blisters resemble uneven collection of rounded or blister-like bulges caused by uneven contour of annual growth ring.
| Possible Causes | Solutions |
|---|---|
| Drying of Topcoat on the surface, before air can be released. | 1. Reduce airflow. 2. Reduce heat in the room. 3. Retard the drying of topcoat. |
| Non Drying of Filler, Glaze or Wipe Stain | Dry filler, glaze or wipe stain completely, before applying topcoats. |
| Using Butyl Cellosolve as a Retarder | 1. Butyl Cellosolve is a heavy solvent. If too much is used, it will sink to the bottom of the film. 2. Before completely drying, if the top of the film skins over, then solvent pop occurs. 3. Use optimal amount of Butyl Cellosolve as suggested. |
Blooming / Oil Blooming / Cottoning
When dull patches are formed on the painted surface, the defect is called Blooming or Cottoning.
| Possible Causes | Solutions |
|---|---|
| Floating of Oil from the wood or stain to the Surface. | Use barrier coat to seal off the oil inside so that they do not escape to the surface. |
| Coating over a Glaze | Allow longer drying time. |
| Wiping Filler or Stain without adequately drying results in a Hazy appearance | Applying a heavily retarded lacquer sometimes removes the bloom. |
Blushing
The painted surface might develop a dull white haze on top owing to improper curing and humidity factor. This defect is termed Blushing and it is more prominent in lacquer paints sprayed in humid conditions. Blushing mostly occurs due to moisture/water vapor trapped in the film or resin precipitating out.
| Possible Causes | Solutions |
|---|---|
| 1. Humidity in Air is Above 60%. 2. Damp Spray rooms (generally concrete floors at ground level). | Add upto 16fl.Oz. of retarder solvent in place of thinner. |
| Spraying the paint in Cold conditions | Warm the paint till its temperature reaches 20-30℃. |
| Over-Reduction | 1. By Warming up the room, blushing caused by condensation of water and subsequent evaporation from cold spray rooms can be avoided. 2. Close windows and bring the paint to room temperature. 3. Bring the lacquer also to room temperature. 4. Add retarder to thinner or use high quality thinner. |
| Presence of moisture in the spray equipments. | 1. Check airline for presence of moisture. 2. Ensure that the compressor has air cooler to prevent water condensation. |
Brittleness
Two freshly painted surfaces stick together, when pressed and this defect is called Blocking or Printing. The defect is basically associated with adhesion.
| Possible Causes | Solutions |
|---|---|
| Insufficient drying time | Allow longer air-drying time. |
| Heavier coat Application | Apply lighter coats or reduce. |
| Improper Coating Selection | Check with your coatings supplier for recommended selection to use. |
| Entrapment of Solvent due to Heavy film | Apply lighter coats or multiple passes. |
| Improper Catalyzation | Check with your coatings supplier for proper catalyst amount. |
| Presence of catalyzed material beyond shelf-life | Follow the pot life time recommended by the manufacturer. |
| Drying of Catalyzed material in Cold Environment that is less than 20℃ (cold cure). | Ensure the drying environment is at a minimum temperature of 25℃. |
Wood Blistering
When the coating tends to crack on applying strength, the defect is termed Brittleness.
| Possible Causes | Solutions |
|---|---|
| Over Catalyzing the Paint | 1. Check the measurement of catalyst used. 2. Shorter pot life is a good indicator. |
| Baking of paint at higher temperature | Check the recommendations published by the manufacturer. |
| Paint not formulated for wood | 1. Check for paints exclusive for wooden surfaces. 2. Paints for metal surfaces are harder but they lack elasticity properties found in the wood paints. |
Checking / Crazing of film
When the coating carries excessive weight, cracks and checks result in the film, while aging, in the first twelve months. This defect type is Checking or Crazing of Film. It is not usually associated with nitrocellulose lacquers but is critical when acid catalyzed products like pre-catalyzed lacquers and catalyzed varnishes are used.
| Possible Causes | Solutions |
|---|---|
| Applying Heavy Layers of Coats | 1. Apply only sufficient material to complete full covering. 2. Do not exceed a total thickness of 4 dry mils. |
| Mud Cracking | 1. Occurs when latex is applied in excess, film thickness or drying quickly, after application. 2. Reduce application thickness to balance it. |
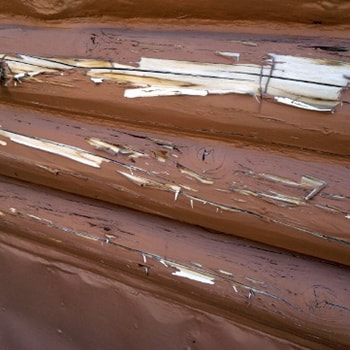
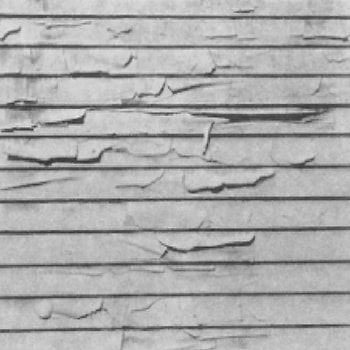
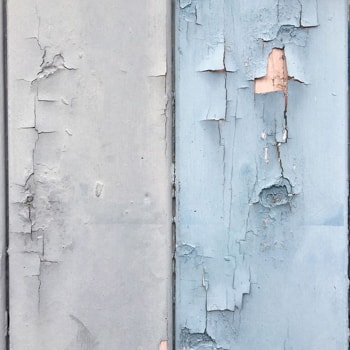
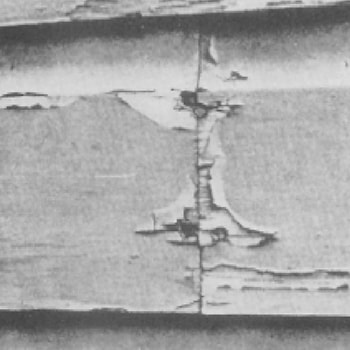
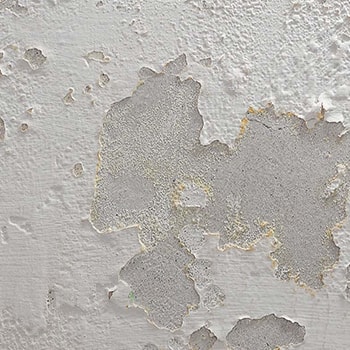
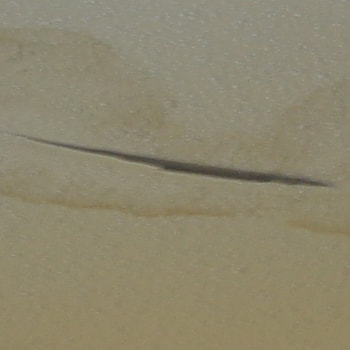
Cracking / Peeling
When the paint lifts from the underlying surface in the form of flakes, it is generally preceded by Cracking and this occurs on different surfaces.
| Possible Causes | Solutions |
|---|---|
| Excessive Dry Film Thickness. This thickness is prominent with acid catalyzed materials | 1. Use wet film gauge during application. 2. Ensure not to have a dry film thickness of more than 4-5 mils with acid catalyzed materials or pre-catalyzed lacquers. |
| Cracking by Occurrence of Repeated cycles of Freezing and Return to Room temperature. | 1. Put a small piece of painted wood in a freezer for an hour and then, keep it in the room temperature. 2. Repeat the process for 10 times and check whether the paint cracks. 3. Paints are formulated mostly to resist upto 10 cycles. |
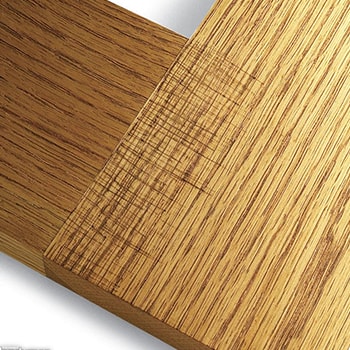
| Cracking of Grain or Veneer | Cracks following the wood grain show that the wood is actually cracking and not the paint. |
| Cracking of Exterior wood and plywood as it Expands and Contracts depending on the Humidity and Temperature. The change is transmitted along the coating also. | Scrape, sand or scrub with a wire brush to remove loose and peeling paint. |
| Poor Paint Penetration on wood with excessive amount of ‘flat’ hard grain pattern that is smooth, hard and non porous. | If needed, sand wood to a fresh surface. |
| Poor Surface Preparation / Applying thin coat of paint | 1. Do not allow the wood to weather prior to coating. 2. Follow label and data page directions on how to prepare surface, before coating. |
Cracking / Peeling
When the paint lifts from the underlying surface in the form of flakes, it is generally preceded by Cracking and this occurs on different surfaces.
| Possible Causes | Solutions |
|---|---|
| Excessive Dry Film Thickness. This thickness is prominent with acid catalyzed materials | 1. Use wet film gauge during application. 2. Ensure not to have a dry film thickness of more than 4-5 mils with acid catalyzed materials or pre-catalyzed lacquers. |
| Cracking by Occurrence of Repeated cycles of Freezing and Return to Room temperature. | 1. Put a small piece of painted wood in a freezer for an hour and then, keep it in the room temperature. 2. Repeat the process for 10 times and check whether the paint cracks. 3. Paints are formulated mostly to resist upto 10 cycles. |
| Cracking of Grain or Veneer | Cracks following the wood grain show that the wood is actually cracking and not the paint. |
| Cracking of Exterior wood and plywood as it Expands and Contracts depending on the Humidity and Temperature. The change is transmitted along the coating also. | Scrape, sand or scrub with a wire brush to remove loose and peeling paint. |
| Poor Paint Penetration on wood with excessive amount of ‘flat’ hard grain pattern that is smooth, hard and non porous. | If needed, sand wood to a fresh surface. |
| Poor Surface Preparation / Applying thin coat of paint | 1. Do not allow the wood to weather prior to coating. 2. Follow label and data page directions on how to prepare surface, before coating. |
Cratering
When small depressions in a finish develop, it is termed Cratering. These small depressions are referred to as fisheye.
| Possible Causes | Solutions |
|---|---|
| Contamination of Silicone, Wax or Oil | 1. Find the source of contamination and eliminate it. 2. Sanding aid on belts may contain silicone, lubricants, oils or greases for machines, belt-dressings, lubricating greases and oils, spray equipment, hand creams or metal and wood polishes can be possible sources of contamination. 3. Find their substitutes and eliminate the enlisted sources. 4. Use anti-cratering additives. 5. Note that silicone will continue to cause contamination of equipment. Hence, the need for higher amount of additives. |
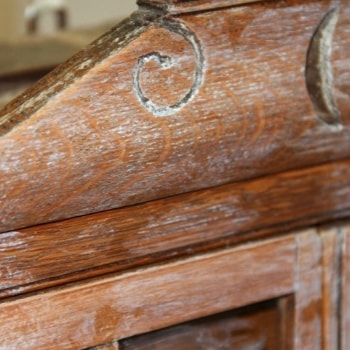
Darkening
When the wood appears with severe mildew but does not lighten when tested with bleach, indicates they have undergone Darkening. This kind of darkening and decaying of wood generally has a solid and consistent appearance.
| Possible Causes | Solutions |
|---|---|
| 1. Exposure to UV (Ultraviolet radiation). 2. Darkening occurs in wood never coated with protective coating (e.g. primer, paint or stain). | Do not expose new woods to weathering for longer periods of time. |
| Occurs under Clear varnishes and Lightly pigmented stains | To achieve best paint and stain performance, coat the new surface before installation or immediately after installation. |
| Darkening happens in Different degrees on Different woods. | Sand the wood to get a fresh surface, prior to priming the entire wood surface that has been allowed to weather. |
| Moisture Penetration in to the Wood causes varnish coatings to peel off due to wood decomposition under the coating. | Discard the wood that cannot be sanded to fresh wood. |
| Woods Exposed to Weather are not protected against wood-destroying organisms. Such exposed wood decays eventually and cannot be coated. | 1. Allow the surface to dry completely, before coating. 2. Apply coatings to treated wood after the moisture content has dropped to a paintable level- usually 15℃ or below. 3. Splash water on the surface to determine, if it is waterproof. 4. If the water gets absorbed and surface becomes noticeably darker, the surface is not waterproof. 5. This test is especially recommended for pressure-treated wood and smooth cedar. 6. Ensure proper penetration of coating. |
Discoloration
When slight dirt accumulates owing to repeated soiling, Discoloration of paint occurs. Following this, a flattening stage develops when the coating starts to chalk, gradually and erode away. Paint on the surface is sometimes discolored by mildew, blue stain, wood extractives and metals long before repainting is necessary.
| Possible Causes | Solutions |
|---|---|
| Mildew The most common cause. | 1. Ensure mildew is killed, before repainting. 2. Use a bristle brush to scrub the painted surface with a mix of 1/3 cup household detergent, 1 quart (5%) sodium hypochlorite (household bleach) and 3 quarts warm water. 3. This solution kills mildew and cleans the area. 4. Rinse the area to be repainted with fresh water, thoroughly. |
| Water-Soluble Extractives. The extractives dissolve and leach from the wood by water. The water moves to the paint surface, evaporates and leaves the extractives behind as reddish brown stain. | 1. Eliminate moisture problems to stop discoloration. 2. Wash the discoloured areas using mild detergents immediately when the problem starts developing. 3. Use paint cleaners if the stains are darker. |
| Ferrous Nails Usage of standard ferrous nails on exterior siding and painting on them leaves a red-brown discoloration through the paint and the immediate vicinity of the nail head. | 1. Prevent rust stains by using high quality galvanized stainless steel and aluminium nails. 2. Do not use any standard ferrous nails. 3. Use an oxalic acid solution to remove the discoloration, if chemical discoloration is not already sealed beneath a finishing system. 4. Apply several applications of an oxalic acid solution to the stained surface, using at least one pound of oxalic acid per gallon of water that is preferably hot. 5. Wash the surface with warm and fresh water to remove oxalic acid and any traces of the chemical that causes stain. |
Drying time
When the optimum Drying time is not sufficient due to various factors, it results in defects.
| Possible Causes | Solutions |
|---|---|
| Humidity Factor/Humid Weather | Use heat and wait for the humidity to settle down. |
| Cold Weather | Ensure the drying area is at room temperature. |
| Oily and Unclean Wood | 1. Clean wood using solvent wipes. 2. Use barrier coat for oily wood as an alternative. |
| Prolonging of Drying due to Oil stains | Use non-oil based stains. |
| No Air Movement | Ensure proper ventilation. |
| Trying to Fill Open Grain wood with heavy coat of sealer actually traps the solvent in the pores. | Use filler or high solids sealers like polyester or polyurethane to fill pores. |
CrateringGloss changes of flat spots
When the glossy finish changes, the defect caused is called Gloss Changes of Flat Spots.
| Possible Causes | Solutions |
|---|---|
| Not Sealing the absorbent Putty or Filler can cause the topcoat to ‘strike in’ | Seal the wood filler or the putty. |
| Not Using Enough Sealer or Not Sanding enough allowing topcoat to ‘strike through’ | 1. Sand carefully. 2. Give special attention to edges and corners while sanding. |
| Changing of Gloss observed on material from same container or Change observed after a few hours of spraying. | 1. Stir the material in the beginning thoroughly to ensure it is uniform. 2. Stir after several hours, if highly pigmented or high amount of flattening agent is used. 3. Sometimes, this agent may cause settling in to occur, quickly. |
| Increase in Gloss with Successive coats | 1. Sand to bring a smoother finish 2. With more coats the finish looks glossier. |
Hazing
When the finish changes to hazy and is not stark as per the standard, it is termed Hazing.
| Possible Causes | Solutions |
|---|---|
| Using Incorrect Thinner | Use recommended thinners. |
| Over Catalyzing with Acid | Sand once again and recoat but ensure to test for inter-coat adhesion. |
| Blushing | Check solutions for Blushing |
| Mixing of Water with Paint due to Humid Air | Clear air line separator and bleed the line once, every shift. |
Lack of Hiding
When after drying, the paint fails to hide the underlying color or surface, on which it has been applied, the defect is called Lack of Hiding.
| Possible Causes | Solutions |
|---|---|
| Higher Reduction of Paint | Add fresh and unreduced material to balance reduction. |
| Application on very Hot, Smooth surface that tends to cause the finish to Flow off | Use a fast evaporating solvent. |
| Slow evaporating solvent causes too much flow | Use a fast evaporating solvent. |
| Improper Stirring of Pigment into suspension, making it settle to the bottom | 1. Stir before use and check if the pigment is evenly distributed. 2. Check for low film build. |
| Edges of the Surface Show through | Round the edges as they might be sharp. |
| Improper Atomization | Adjust the spray equipment |
| No Matching of the Standard paint colour. The base colour is showing through topcoat. Basically Low Thickness. | 1. Apply more paint to achieve full hiding using spray gun. 2. Colour the base coat with same topcoat colour for extra hiding. 3. If the pigments used are organic, make thicker film as they lend poor hiding. |
Marring
Shiny patches might appear when the painted surface is subjected to cleaning or brushing, this defect is referred to as Marring.
| Possible Causes | Solutions |
|---|---|
| Incomplete Drying of Paint Film | Allow more days for drying before cleaning or brushing the surface. |
| No Coalescing of the Emulsion base is observed, when the temperature is bellow 55℉ and the surface is not cured. | Apply the paint at recommended temperature conditions. |
| No Curing of Acid and Polyester coating at Low temperatures. | 1. Check the manufacturer’s recommended temperature range. 2. Usually the paint takes 7 days to reach full hardness. |
| Pot Life Expiry | Use within pot life or reactivate with fresh materials and catalysts. |
| Soft Film Formation | 1. Use recommended systems only. 2. Check if mar-resistant additives can help. 3. Do not use NC lacquer, if a hard scratch resistant film is needed. |
CrateringGloss changes of flat spots
When excessive moisture gets into painted wood, the paint may blister and peel, this condition is termed Moisture Blistering and Peeling.
| Possible Causes | Solutions |
|---|---|
| * The first step in solving a moisture problem is to Locate the Source of water causing the moisture problem. * The Possible Sources of troublesome water that can affect paint life on exterior wood surfaces are: 1. Outside Water Penetrating the wood. 2. Inside Liquid water soaking through the wood. 3. Inside Water Vapour passing through walls, condensing and soaking the wood | 1. Treat the exposed end grain and joints with water repellent preservative to minimize problems caused by water. 2. Fill open joints, cracks and holes with high quality paintable latex caulking compound. |
Dampness
Dampness is the seepage of water and the resultant wet/humid conditions prevalent on the wall. This is very conducive to the growth of Fungi (interior surfaces) or Algae (exterior surfaces). The problem affects new and old houses alike if it is not addressed appropriately. Dampness can lead to blistering, discoloration, and paint peel-off if it is not resolved.
Checking Dampness
• If you hold your palm on the seeping cement surface, you can feel the dampness.
• Many times, they are visible as water spots or marks on the wall surface.
| Possible Causes | Solutions |
|---|---|
| Poor Waterproofing | Adopt better water proofing solutions |
| Poor Sealing of Cement Surface and Exterior cracks. | Make appropriate structural changes, if the surface is dilapidated or damaged. |
Undulations
When the surface is not even or leveled, they are called Undulations. Surface leveling is a prominent contributing factor to the overall quality of the finish.
Checking Undulations
• When the surface is viewed from a lower angle, Undulations are visible.
• Undulations are more obvious on glossy surfaces.
| Possible Causes | Solutions |
|---|---|
| Minor Structural Imperfections | Level using Putty (Cement base putty/ Acrylic WP). |
| Major Structural Imperfections | Level using POP, as desired. Select matt finishes, when the Undulations are evidently visible |
Higher Alkalinity
Painting on surfaces having higher alkalinity is very challenging, unless the pH level is reduced. The paints delaminate or strip off from the surface due to high alkalinity.
Measuring Alkalinity
• Alkalinity level can be checked using a simple pH paper.
• A value between 1 and 6 is termed acidic and a value between 8 and 14 is termed alkaline.
| Possible Causes | Solutions |
|---|---|
| Between pH values 8 and 9 | Use any primer. |
| Between pH values 10 and 11 | Use water-based primers only. |
| Between pH values 12 and 14 | 1. Wash the heavy alkaline surface with lime. 2. Bring down the pH level to the recommended level. 3. Paint the surface based on its nature and as per recommendations. |

Algae & Fungus growth
The growth of Algae and fungi on the walls creates spots on the walls. While Algal growth is seen as greenish spots, the Fungal growth is black or reddish brown in colour. Algae grow mostly on the exterior wall surfaces because they need sunlight. However, the Fungi grow on the interior surfaces because they thrive on dampness and do not require sunlight.
Main Causes
• Dampness and Vegetation around.
| Surface | Solutions |
|---|---|
| Plastered Exterior Walls | Step 1 1. Clean the affected area by sanding it. 2. Prepare a Bio wash by mixing 10% bleaching powder in 1 litre of water. 3. Follow Solutions Step 2. Step 2 1. Lay Waterproofing to prevent Algal and Fungal growth. |
| Masonry Surface | Step 1 1. Clean the affected area using wire brush. 2. Ascertain if the masonry surface has Algal or Fungal growth. 3. Prepare a Bio wash by mixing bleaching powder in 1 litre of water. 4. Use 5% of bleaching powder in case the growth is Fungal and 10% for Algal growth. 5. Follow Solutions Step 2 Step 2 1. Filter the bio-wash prepared. 2. Apply a Coat of the bio-wash on the affected area using a brush. 3. Allow the coat to dry for 2-4 hours. 4. Clean the surface with water. 5. Paint the surface as recommended. |
| Plastered Interior Walls | Step 1 1. Clean the affected area by sanding it. 2. Prepare a Bio wash by mixing 5% bleaching powder in 1 litre of water. 3. Follow Solutions Step 2. Step 2 1. Lay Waterproofing to prevent Algal and Fungal growth. |
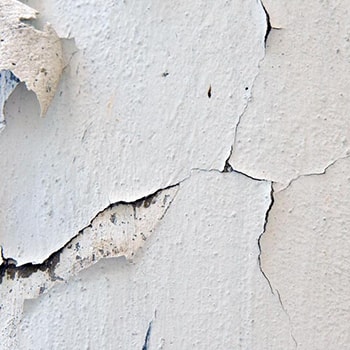
Cracks on walls
A split on the wall surface is called Crack. The Cracks can be either on columns and beams or on the plaster laid. Cracks on columns and beams are deeper than those on plaster. The plaster laid on both interior and exterior walls can develop cracks.
| Surface | Causes | Solutions |
|---|---|---|
| Columns and Beams | Rusting of steel inside the concrete. | Fill it with recommended cement and sand mixture. |
| Plastered Exterior Walls | Improper Curing and Temperature Variations. | 1. Use white cement, powdered putty, right mixture of cement and sand or compounds with silica. 2. Do not use POP. |
| Plastered Interior Walls | Improper Curing and Temperature Variations. | 1. Use Putty, POP or any other crack filler. 2. Fibreglass Tape gives better results. |
Bitty film consistency
When you can feel rough, gritty particles embedded in the paint film, by your hand, it means the paint has developed a bitty film consistency.
| Possible Causes | Solutions |
|---|---|
| Prevalence of Dusty Atmosphere | Do not paint when the atmospheric condition is dusty. |
| Not Filtering the material before use | Filter the material before use. |
| Using Contaminated Water for Diluting paint | Use clear and potable water for diluting the paint. |
| Keeping the paint open for longer duration results in Formation of Skinning. | 1. Allow the paint to harden and dry completely. 2. Sand the surface smooth. 3. Use a clean brush and paint. |
Storage defect - Foul smell
When the microbes attack the organic matter present in the wet paint formulations, bad odour or foul smell emanates. This defect mostly happens with water based paints.
| Possible Causes | Prevention / Solutions |
|---|---|
| Storing paints even after pot life. This happens since, the microbial agents in the paint formulation become inactive after the expiry date. | Use the paint immediately after thinning. |
| Storing paints for longer duration | Store only till the pot life mentioned. / Discard the paint as suggested by the manufacturer. |
| Thinning the paint with Contaminated Water | Do not retain thinned paints for longer periods. |

Storage defect - High Viscosity / Gelling / Curdling
When the viscosity of the liquid paint increases beyond a recommended point, High Viscosity/Gelling/Curdling occurs.
| Possible Causes | Prevention / Solutions |
|---|---|
| Storing paints for longer duration | Store only till the pot life and in the conditions mentioned by the manufacturer. / Discard the paint, if Gelling or Curdling has occurred. |
| Using Contaminated Tools while handling the paint. | Do not use contaminated tools. |
| Thinning Paint with Solvents not recommended | Thin the paints only with the kind of thinners that are recommended by the manufacturer. |
| Mixing Different Brands or Types of paints that are essentially different in composition. | Do not mix different brands or types of paints. |
Storage defect - Settling / Vehicle separation
When components like pigments and extenders used in the paint formulations settle down at the bottom, the condition or defect is called Settling. Once, settling sets in and the settled components harden and become sticky, the paint cannot be re-dispersed.
| Possible Causes | Prevention / Solutions |
|---|---|
| Storing for Longer Duration | Do not store the paint for longer durations after thinning. / 1. Stir the paint mechanically till it reaches a homogenous consistency as recommended by the manufacturer. 2. Discard the paint if stirring does not produce favorable results. |
| Storing in a Warmer place | 1. Do not store the paint in warm places. 2. Store the paints in conditions mentioned by the manufacturer. |
| Excessive Thinning of paint that results in reduction in specific gravity and viscosity of the paint. This disables the quality of pigment to remain in suspension. Hence, it settles down. | Thin the paints as per the suggested ratio. |
| Thinning the Paint with incompatible and non recommended compounds. | Thin the paints only with the kind of thinners that are recommended by the manufacturer. |
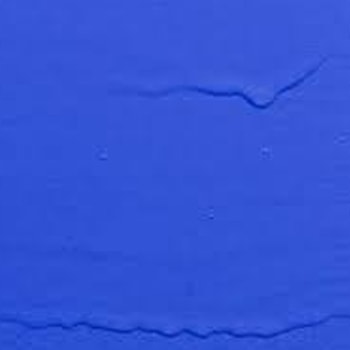
Sagging
When the paint drips down from the top layer of application owing to gravity, uneven coverage results and this defect is termed Sagging.
| Possible Causes | Solutions |
|---|---|
| Applying a Thick film of paint | 1. Apply a few thin coats as recommended. 2. Avoid applying one thick coat, instead of a few thin coats. 3. Allow the paint to harden perfectly, after application. |
| Diluting Paint More than recommended | 1. Thin the paint in the suggested ratio of dilution. 2. Sand and smoothen the surface perfectly, prior to paint application. |
| Applying Paint on an Ultra Smooth surface | 1. If the surface shows sagging and the paint is fresh, spread the paint on the surface using a brush or a roller. 2. If the surface is sagging and the paint is dry, sand the surface and repaint. |
Chalking
When the paint forms a fine powder on the surface and sticks on the person who leans on the surface, the defect is referred to as Chalking. This phenomenon occurs primarily due to weathering.
| Possible Causes | Solutions |
|---|---|
| Exposure of the Painted surface to Moisture and Sunlight for longer years | 1. A chalked surface needs to be repainted. 2. Repaint in appropriate weather conditions. |
| Not Priming and Sealing the Porous surface, before painting | Prepare the surface properly, prior to painting. |
| Using Low Quality paint or a non- recommended paint in the exterior surfaces and Thinning the paint too much. | Use recommended paints and thin them at suggested ratio. |
| Applying or Spreading paint in thin layer | Repaint in perfect thickness. |
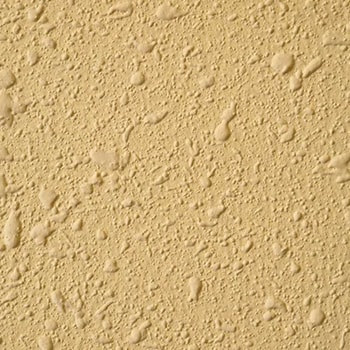
Blistering
When the painted surface lifts off and appears like a blister, the condition is called Blistering. A blistered surface will eventually peel off.
| Possible Causes | Solutions |
|---|---|
| Painting on a surface that is too Hot and gets Direct Sunlight | Sand or scrape the blisters and remove the entire paint from the surface. |
| Exposure of the painted surface immediately to High Humidity, Rain or Dew | Coat the bare areas with high quality primer. |
| Moisture Penetration through the interior walls of bathrooms, kitchen, and laundry rooms, where the Humidity is generally High. | Repaint the entire surface with high quality paint under desired temperature conditions. |
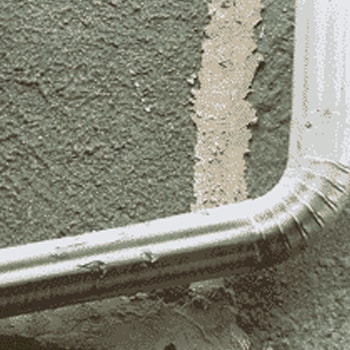
Poor Adhesion
When the paint film does not adhere to the surface and peels off, the defect is called Poor Adhesion.
| Possible Causes | Solutions |
|---|---|
| Very Smooth, Oily and Greasy surface | 1. Prepare the surface thoroughly, before painting. 2. Sand the smooth, oil or greasy surface before painting. |
| Failing to remove Dust, Rust and other particles from the surface | Remove dust, rust and other particles from the surface, prior to painting. |
| Not Removing the previous Glossy paint surface | 1. Sand the previous glossy surface. 2. If the paint is peeling off, repaint after preparing the surface, thoroughly. |
Wrinkling
When the painted surface appears wrinkled, with a rough texture, it is termed Wrinkling. The defect generally appears like skin on an uncured paint surface
| Possible Causes | Solutions |
|---|---|
| Build up of Thicker Film | 1. Thin the paint at a recommended ratio of dilution. 2. Apply a few thin coats as suggested. 3. Avoid applying one thick coat instead of a few thin coats. |
| Paint is More Viscous | Ensure good ventilation and let the room temperature be at the recommended level, for interior painting. |
| Presence of Surface Contaminants | 1. Avoid surface contaminations. 2. If wrinkling is moderate or minor, sand the top coat alone and apply paint, as per the recommendations. 3. If wrinkling is major, completely sand the surface and repaint the affected area. |
Brush Marks
While applying paint on any surface, if the finish leaves a mesh-like pattern, it is referred to as Brush Mark. This kind of pattern can be either horizontal or vertical.
| Possible Causes | Solutions |
|---|---|
| High Consistency of the paint | Sand the surface to get a smooth finish. |
| Faster Drying of the Paint Material | Mix and thin the paint thoroughly as recommended so that the consistency is proper. |
| Prevalence of High Temperature in the surrounding | Paint, when the temperature is optimal and right as recommended. |
| Poor Workmanship | Entrust painting to workman who deliver quality results. |
| Using Poor quality Brushes | 1. Use good quality brushes only. 2. Use roller application, after brushing. |
Fading / Poor color retention
When the surface is exposed to excessive light, Fading can happen. Southern exposure is the direction of the sun and it is harsher. So, surface with southern exposure fades faster and results in poor colour retention. Poor Colour Retention also occurs due to chalking or disintegration of the painted surface.
| Possible Causes | Solutions |
|---|---|
| 1. Using Low quality paints. 2. Painting Exterior with paints that are meant for Interiors. 3. Painting in Certain Colours that are more prone to fading like certain bright red, blue and yellow colours. The ultra violet exposure on these colours makes them fade faster. 4. Painting Masonry Surfaces like Stucco and Concrete that are not cured properly. This results in a condition called “Alkali Burn”. 5. Tinting with White or Light coloured paints that are not supposed to be used for tinting, can make the surface look faded. 6. Adding Too much Colorant to a light and medium paint base. | 1. Remove the faded exterior completely by sanding. 2. Repaint the entire surface using high quality exterior paint and colours as recommended. |
Dirt Pick-up
The defect, when dirt, dust or other fine debris accumulates on the painted film is called Dirt Pick-Up. The dirt picked up so, might resemble mildew.
| Possible Causes | Solutions |
|---|---|
| 1. Using Low quality paints 2. Splashing of Soil on the painted surface | Use high quality paints that are formulated with superior dirt pick-up resistant components. |
| Air Pollution and other Air-borne Dust collecting on the painted surface | Use paint with high gloss or sheen. They are more resistant to dirt pick-up than flat paints. |